
for a designer that is...
is the kind that is willing to think outside the box, daring when it comes to their home AND wants your opinion and advice about what to do. Even better...they let you be a part of it - the shopping, painting, demo, etc. {and their husband doesn't care what they do!}
Luckily, I have one of those friends. When she calls and starts out the conversation with, "Sooo...I was thinking..." I know it is going to be good, might challenge me to think outside the box, will probably require getting a little messy, but will be a lot of fun and WILL happen ASAP. When she has an idea, not a week goes by before it is complete. Sometimes it is all I can do to slow her down to 'sleep' on it and think it all the way through.
At the end of June I got one of those calls. Her husband was studying abroad for a month and would be returning in a week or so and she wanted to PAINT HER KITCHEN CABINETS! She needed to touch up the old white cabinets, but didn't have the matching paint color, and thought maybe a different color would look good, and that is where I came in.

Here is the before...isn't that hardware just lovely! We replaced that too. She had already taken the pulls off when we remembered to take a before picture, but they looked something like a curly swirly 'S' and had been spray painted the same silver as the hinges.


Here is the before...isn't that hardware just lovely! We replaced that too. She had already taken the pulls off when we remembered to take a before picture, but they looked something like a curly swirly 'S' and had been spray painted the same silver as the hinges.
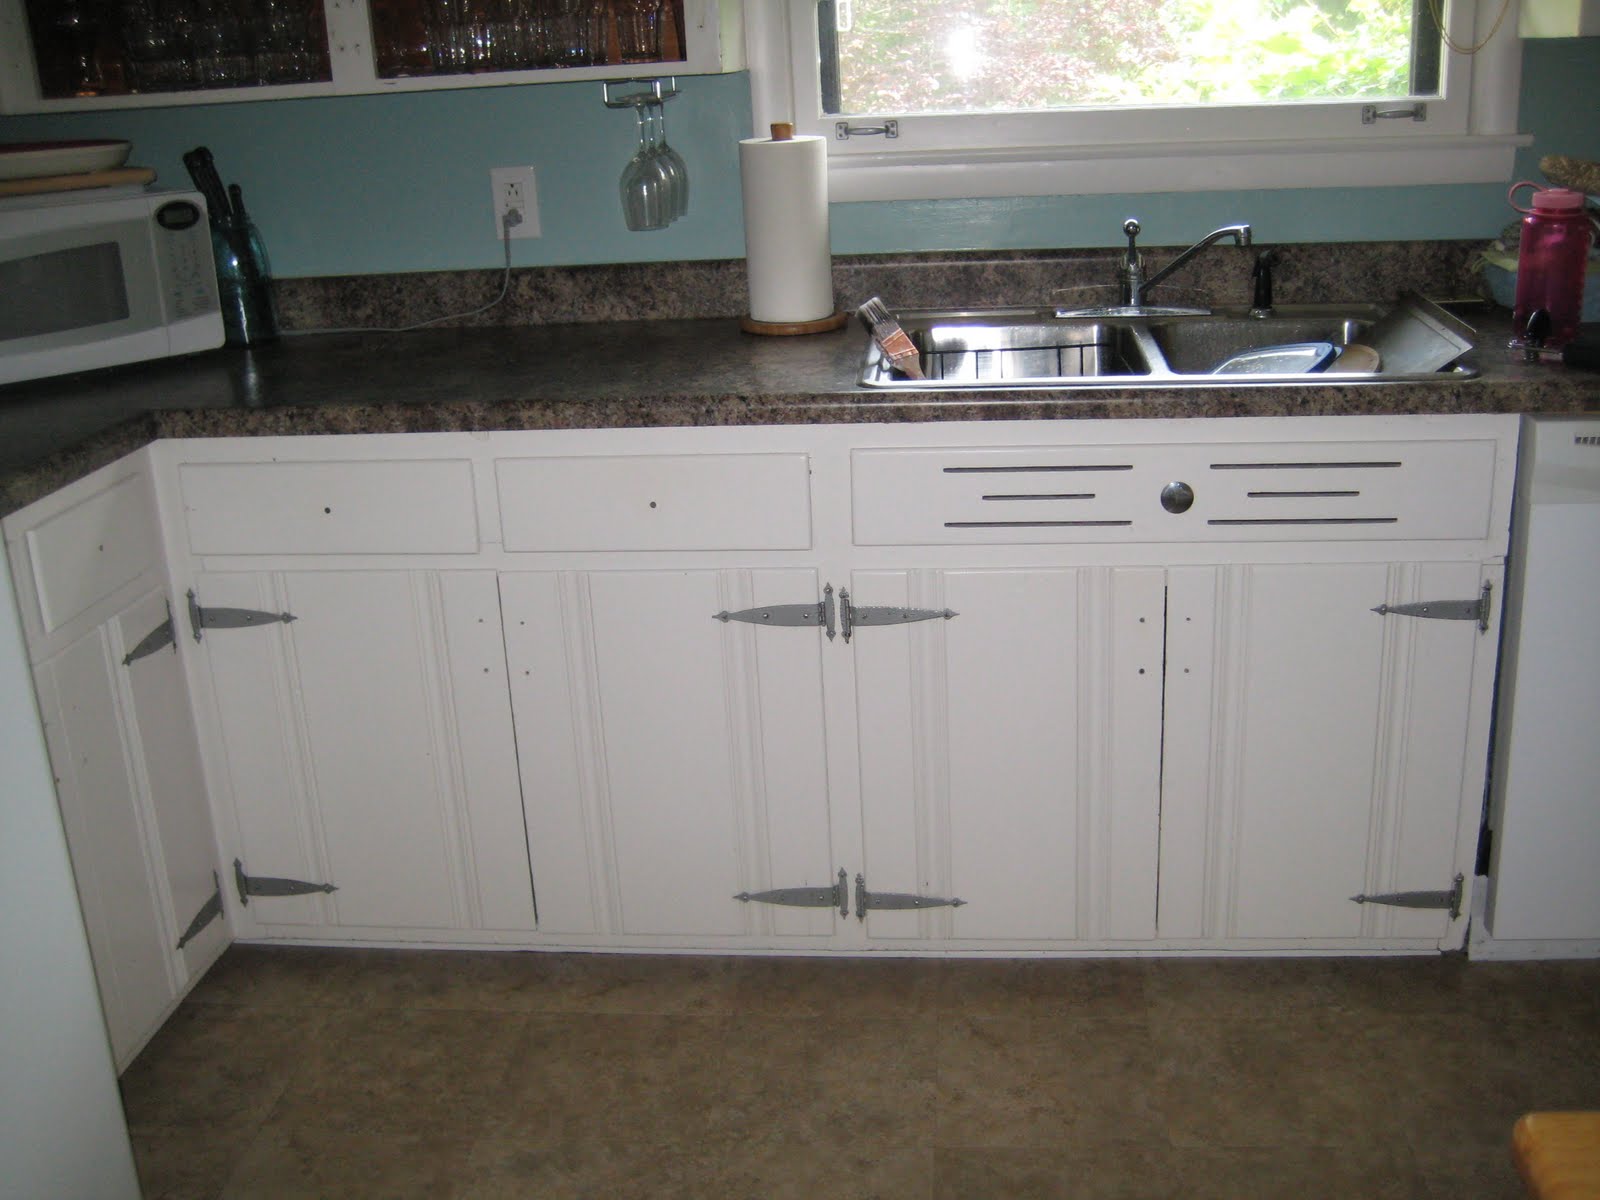
We ripped off the old hardware and doors, sanded the faces down and picked out a new color with new updated hardware. I believe all supplies ended up costing just over $100.

And what a difference!


Now it is the perfect kitchen for this fun and adventurous couple. Well almost, I know she has a few other upgrades she would like to do down the road...
A few tips if this is a project on your 'to-do' list:
1. Talk to your local paint store about what kind of paint is on your current cabinets (i.e. oil or water based).
2. make sure it is not raining or too humid outside. Let a couple days pass after a big rain so the air is dry.
3. A semi-gloss is very durable and cleanable paint surface.
4. If you are replacing hardware be sure to pay attention to the number or holes your current hardware has and the distance of those holes, you may have to fill some holes before painting.
5. Try the hinges out before to double check the fit of the doors. We ran into a problem at the end and had to cut down several of the doors about 1/4" because the new hinges shifted the doors over.
best of luck!
Linking up to:


I'm so glad that I came across this post...we re-modeled our kitchen, actually our whole house, last year and I love it. I've been wanting to add some type of window treatment but have a similar piece in front of my window (that's connected to the cabinets) as this one!! Thanks for a great example!
ReplyDeleteWell heck! We could all use a handy friend like you =) What a great makeover.
ReplyDeleteVery nicely done.
ReplyDeleteHugs,
Ellen
That kitchen looks so awesome! Oh wait... that's my kitchen! Thanks for helping me out Missy!
ReplyDeleteWhat is the color you used on the cabinets? I LOVE it!
ReplyDeleteSherwin Williams Keystone Gray SW7504
Delete